Step 1: Soak your almonds for at least 24 hours prior to making your milk.
For a nutritional boost, use sprouted almonds.
Step 2: Rinse your almonds and then put them in the blender with filtered water. For every cup of almonds, add three cups of water.
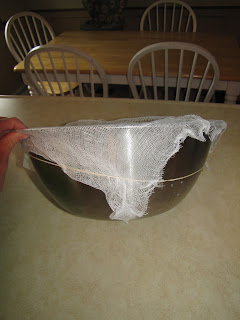
Step 3: Put a large piece of cheesecloth over a bowl and secure with a rubber band. Slowly pour your almond milk into the bowl to filter the chunks of almonds.
Step 4: Squeeze the milk from the cheesecloth and set aside your almond leftovers.
Step 5: If you want to do another filtering, a coffee liner in your funnel works well (but takes a while to filter).
Step 6: If you're lazy like me, and don't mind a few small chunks, just ladle the milk directly into your containers.
Step 7: Make sure to add a pinch of salt to each container before you seal them up, which will help to preserve the milk (mine lasted 4-5 days). You can taste it when it starts to go sour.
Chill the milk in your fridge before serving.
One pound of raw almonds yielded this much milk and almond pulp:
In the future, I will not make quite as much, because it is hard to use up so much milk before it spoils.
I used my pulp to make two batches of homemade granola bars.
If you're planning to drink the almond milk as a milk substitute, you may want to flavor it with some vanilla or warm it up with some honey. It has a very bland, nutty taste without any extra flavoring.
You can also add a liquid calcium supplement and probiotic powder to make it a more nutritious milk substitute for people with milk allergies.
My boys and I enjoyed the milk in a smoothie. Yum!
Enjoy!
-Jessica


What a great post! I wish I had know how easy it was back when I was paying out the ying-yang for store bought almond milk (that contained soy! BLECK.)
ReplyDeleteIf would would be willing to share, will you post this on Must Follow Recipes, please? I think this would be a GREAT benefit to the readers. :)