Showing posts with label organic. Show all posts

Wednesday, September 11, 2013

Preserving Apples

It's that time of year again!  Pretty soon beautiful bushels of fresh, locally-grown apples will start filling every corner of my house, just waiting to be preserved.


Apple season is usually extremely busy in our household.  I spend approximately two whole weeks in the kitchen washing, peeling, coring, and preserving them because they are some of my family's favorite treats.

Did you know that even the organic apples and pears sold in the grocery store are sprayed with antibiotics?  Apples and pears are the only two foods in the United States that are allowed to be full of antibiotics and still display the organic label.  This is a huge problem that is being widely debated and the hope is that by 2016 it will no longer be allowed.  These antibiotics play a role in gut health and antibiotic resistance, so it is really important that we stop this practice, especially among organic growers.

Since apples and pears are so vulnerable to bacteria and infections that can kill the trees, it is almost impossible to grow them without spraying.  There are alternatives, but they are too costly for the average farmer.

Because of this, whenever I get my apples, regardless of the organic-labelling or not, I do a thorough washing in vinegar.  Water alone is not enough.  The vinegar will kill 98% of bacteria, pesticide residue, and anything else that may be on the peels.  Just fill your sink (sanitized with vinegar) with the apples, cover with water, and add two cups of vinegar.  Let them soak for about ten minutes (apples obviously want to float, so just make sure that you push them under and mix them around every few minutes), drain the sink, and then rinse them before eating or preserving.


Here are my essential tools for apple preservation:

Apple Peeler
Apple Corer
Large Stockpot
Large Wooden Spoon
Food Processor*
Canning Supplies (water bath canner, mason jars/lids, tongs)
Juicer
candy thermometer
Dehydrator
Freezer Bags/Containers

*some people prefer to throw their apple in with the peels and then use a food mill when they cook down.  I prefer the consistency of the applesauce when I peel them first and then puree with a food processor after they have cooked.

To can my applesauce I use my peeler to peel and core, and then throw the apples into my stockpot with a small amount of filtered water to prevent sticking.  Once the apples have cooked down a little and have softened, I run them through the food processor until they are completely pureed.  My children prefer a very smooth applesauce and this method seems to work best for obtaining the desired texture.  After it is pureed it goes back into the stockpot until it reaches a boil.  Then I fill my jars with 1/2 inch headspace and process them for twenty minutes in the water bath.

Toward the end of my preserving marathon I sometimes get lazy and stop peeling apples.  I will simply cut the apples using my corer and throw them, peels and all, into the stockpot to cook down (make sure you used the vinegar wash if you're going to do this).  When you put the apples into the food processor they will still blend down to a nice puree, but it won't be as smooth as without the peels and you will see little slices of peel in the jars.  My kids don't really notice a difference, but I definitely prefer the sauce without the peels.  We can go through 2-3 quarts of sauce each week (100+ each year), so when you're canning in those quantities you sometimes have to cut corners to get it all done!


Apple Juice is another favorite of mine.  When I get to the end of my canning session it's a really easy way to use up apples and preserve them.  I just throw my halved apples straight into our juicer (we have the Jack LaLanne) and then heat the juice that comes out to 190 degrees (I use a candy thermometer to check).  You are not supposed to boil the juice.  Once it reaches the temperature I ladle it into my jars with 1/4 inch headspace and process for ten minutes in the water bath.

If you don't have a juicer you can do it the old-fashioned way - throw your chopped apples into the stockpot with water (1 quart filtered water per 12 pounds apples) and once they have cooked down you can strain them through something like cheesecloth to get the juice.


Freezing is a wonderful way to preserve your apples.  Most canning books will tell you to treat your apples with a produce protector before freezing to prevent darkening, but I've never done it and haven't had a problem.  The frozen apples do discolor a little bit, but since you're usually using the frozen apples for things like pies and cobblers, the discoloration doesn't really matter.  My favorite use for frozen apples is in stove-top potpourri.  I throw a cup of the apple slices in a pot with some water, cinnamon sticks, whole cloves, and dehydrated mint, and put it on simmer.  The smell is amazing and a great alternative to chemical-filled candles and air-fresheners.


Dehydrating apple rings is another great way to preserve apples.  If sliced thinly enough they will turn crispy like a chip - a favorite for my children.  If the slices are a little thicker they will be somewhat chewy, but still tasty.

The best way to ensure thin slices is to use an apple peeler.  When you're done you get nice apple rings that are uniform in size and fit nicely on your dehydrator tray.  I usually fill my dehydrator in the morning and by dinner they are ready (every dehydrator is different).

I've made my apple chips both with the peels and without and they are both equally delicious.


I hope you have a wonderful apple preserving season!  There is so much you can do with this delicious fruit to ensure that you will enjoy it all through the winter months.  If you are interested in recipes for things like apple butter, apple pie filling, or other sugary treats, I've always had good luck with the Ball Blue Book.  I like to use tried and true recipes to ensure that what I make will be preserved safely.

Happy (almost) autumn everyone!  And remember - an apple a day keeps the doctor away!

-Jessica

Friday, August 23, 2013

Making and Preserving Homemade Chicken Broth

Note: People often use the terms stock and broth interchangeably. Essentially, they are the same thing - water flavored with bones, meat, and vegetables. The main difference is that broth is seasoned and stock is not. I like to flavor before preserving, therefore what I make is a broth, but if you were to leave out the flavoring, you could have a bland stock to season as needed with your recipes.

As I am reaching the height of my canning season, I am working on a series of posts about food preservation. I think the best place to start is with homemade stock.

Do you ever wonder what to do with the carcass after you roast a whole chicken? Making a bone stock or broth out of it is easy and saves you a ton of money. Throughout history bone broths have been known to have healing effects: mitigating cold symptoms, helping with inflammation, relieving digestive issues, and just giving us a sense of comfort when we're under the weather.

The most common brands of broth, like Swanson, are misleading in their advertising.  Many brands contain MSG, a neurotoxin, so Swanson wants us to know theirs is healthier and makes sure to label it as "all-natural" and "MSG-free".  The problem is that Swanson chicken broth contains yeast extract, which means the broth does in fact contain MSG.  It's a labeling trick that is dishonest.  To learn more about MSG and yeast extract, read this.

Buying a good, organic bone broth in the grocery store is difficult, not only because they are often seasoned with items you don't want, but they are pretty expensive.  Take Pacific Foods Free Range Organic Chicken Broth, which contains organic chicken broth (filtered water, organic chicken), organic chicken flavor, (organic chicken flavor, sea salt), natural chicken flavor (chicken stock, salt), organic evaporated cane juice, organic onion powder, turmeric, and organic flavor.  I don't know about you, but I have no idea what "organic flavor" is and I prefer that there isn't hidden sugar in my broth. Besides, for $4.00 per 32 ounces, I would at least like to see some veggies in the broth.

Instead of spending so much on nutritionally inferior broth, why not make your own out of something that costs you nothing extra, as you intend to throw the carcass in the garbage anyways?

All the equipment you need to make your own broth is a large stock pot, something to strain it with (like cheesecloth), and eight quart-size canning jars/lids.  I use my Cuisinart 12 Quart Pasta Pot because it allows me to throw all of my ingredients in the pasta insert and once the broth is done simmering I can pull the solids out without having to strain the broth through anything.

If you don't have a pasta insert, just throw your carcass, veggies, herbs, and seasonings straight into your stockpot and strain it when it is done.

Remember not to use a stock pot coated with Teflon or other non-stick coatings and additives.  It makes little sense to worry about your food additives while cooking with pots that contain carcinogens. 

MAKING THE BROTH
8 quarts filtered water
1 organic, free-range chicken carcass
3-4 organic carrots
3 organic green onions
2 cloves organic garlic
10-15 whole peppercorns
2 T sea salt

I do not add herbs now, because I prefer to add them directly to whatever food I am using the broth as a base for, but you could add some now if you want to - bay leaves or rosemary would be nice.

Bring the water to a boil and then let it simmer on the stove for about four hours.  If you have your solids directly in a stock pot you're going to want to stir it every now and then to make sure the veggies aren't sticking to the bottom.  If you're using the pasta insert it is not necessary.

After four hours you have a delicious broth that you can either preserve by freezing or canning, or put directly in the fridge, where it will last for about one week.  Freezing is a great option if you have the space for it, however, I prefer canning my broth so I don't waste precious space in my deep-freezer.

CANNING THE BROTH

To preserve your broth you are going to need a pressure canner.  I have a Presto 16 Quart canner and it is easy to use, although quite intimidating the first time.  If you've never used a pressure canner you may want to invite someone over to help you initially, as it is very different than using a water bath canner.

My canner fits 7 quart-size jars, and since I prepare 8 quarts of broth at once (1 inch of headspace), I leave one in the fridge for immediate use.  The rest go into the canner for 25 minutes at 10 psi.


And there you have it - 8 quarts of delicious homemade broth to use as a base in your soups and other meals.  Not only is it nutritionally superior to what you can buy in the store, but it saves you about $32 if you were buying the same quantity of organic broth there.

In case you're wondering, you CANNOT preserve broth with a water bath canner.  It is a low-acid food, which needs to reach 240 degrees for a specific period of time in order to kill the bacteria that would spoil it.  A water bath canner cannot reach that temperature.

 -Jessica

Monday, November 12, 2012

Homemade Lip Balm

I suffer from terribly dry lips.  In the winter they crack and bleed and look just awful.  Unfortunately, my oldest son inherited my lovely dry skin and suffers from the same problem.  I've always settled for less than natural chapsticks for myself, but when my son started needing something to moisturize his little lips, I began a search for safer alternatives.

ChapStick brand lip balm is some seriously nasty stuff.  The original flavor even contains the controversial carcinogenic oxybenzone.  The full list of ingredients is:  arachidyl propionate, camphor, carnauba wax, cetyl alcohol, D&C red no. 6 barium lake, FD&C yellow no. 5 aluminum lake, fragrance, isopropyl lanolate, isopropyl myristate, lanolin, light mineral oil, methylparaben, octyldodecanol, oleyl alcohol, paraffin, phenyl trimethicone, propylparaben, titanium dioxide, white wax, propanol.

Gross!  I wouldn't eat any of that stuff or feed it to my kids, so why would I want to rub it on our lips, where it could potentially end up inside of our mouths?

Burt's Bees is a common "natural" brand that is a little better for you.  The ingredients for the beeswax lip balm are:  beeswax, coconut oil, sunflower seed oil, peppermint oil, lanolin, tocopherol, rosemary leaf extract, soybean oil, canola oil, and limonene.

These ingredients aren't horrible, but I know that the oils and extracts that companies like this use are not food-grade.  I wouldn't fry my eggs in the canola or soybean oil they use in this product, so I don't want to taste it on my lips.

I had finally found a great locally-made chapstick at our local bulk foods store, but the Amish man who made the stuff moved out of the area and it was no longer available.  After my son ruined my last tube of this wonderful stuff, I decided to look at the ingredients and see if it was something I could handle making myself.


I felt really silly for paying that $2.99 after taking a look at how simple it is - beeswax, coconut oil, honey and vanilla extract.

The beeswax is to help solidify the mixture.

The oil is obviously the moisturizer.  As you may know, I'm a huge fan of coconut oil for its nutritional benefits.  But coconut oil is also antimicrobial and anti-aging because of its high lauric acid content.  It's great for skin and can even help heal bruises and rashes.

The honey is what preserves the lip balm.  Not only does the honey taste good, but it will keep the mixture from molding.

The vanilla is for flavor, but you could use anything in its place.


For my balm I decided to use peppermint oil instead of vanilla.  I like the soothing and calming effect that peppermint seems to have on me.

My recipe:

10 T coconut oil
3 T beeswax
1 T honey
30ish drops of essential oil

I placed the coconut oil and beeswax in a double broiler and melted it down.  It would be much faster to grate or chop your beeswax.


Once everything melted I added my honey.  Make sure your honey completely mixes with the oil.  It's going to naturally want to separate, so it takes a little work to keep it mixed.

Once you take it off the stove, add your essential oils.  If you add the oil while it's on the heat you run the risk of breaking it down and losing the scent.

From here I filled my containers.  I prefer a lip balm that I can use my finger to apply, but my son needs it in a tube or we'll end up with grease everywhere.  You can order empty tubes online.

For this batch I filled empty lidded paint cups that I got at Hobby Lobby 12 for $2.99, so they end up costing a quarter each.  The great thing is that they can also be reused when I make my next batch.


I use one of my kids' medicine syringes to fill them.  Something like this is especially helpful for filling the tubes.


You want to make sure you stir your mixture before filling each container.

The recipe I posted above filled 15 of my containers.  I figured my cost to be a little over fifty cents each.  Why would I ever buy lip balm again??


This stuff is rich and creamy and really stays on your lips for a while (that is if you can keep from licking it off your lips - it tastes wonderful)!

These would make a wonderful Christmas gift for friends and coworkers.  You could even slap a cute mailing label around the container to dress it up a bit.


The total time to make these was less than twenty minutes and it was so easy my five year old could do it.  In fact, when his empty tubes arrive in the mail I plan on having him make his own batch (with a little supervision).

After this project I have realized just how much money you can save by making your own moisturizing products.  In the next week I plan to make some diaper rash cream, lotion bars, belly butter (to prevent stretch marks on my pregnant belly) and cream for my second child's eczema.  I'll make sure to share my results after some experimentation when I settle on recipes that work.

I think we know what everyone around me is getting for Christmas this year! :)

Friday, June 10, 2011

Is Eating Organic Really Expensive?

We live in a culture that expects food to be cheap.  REALLY cheap.  Shows like Extreme Couponing now have shoppers obsessed with getting the best deals on what they feed their families, but the problem is that you can rarely find a coupon for anything that is actually good for you.  Because of this, people say that eating organic is just not affordable for the average family.  I beg to differ. 

Here are some of the statements people make that I find to be completely untrue.

Eating organic is too expensive for the average American family.

People tell us all the time that they want to eat the way we eat, but they just can't afford it.  I wish they knew that we spend the same amount on organic food as they do on their grocery shopping, we just put a lot of effort into it.  If people are willing to spend hours a week looking online for deals and clipping coupons, they could instead be spending that time preparing food at home, taking care of a garden, and saving money on healthy foods.

Here are some examples of the foods we eat that are just as cheap, if not cheaper, than comparable items you find at the grocery store:
  • Oatmeal - If I go to our local megatore (Meijer) and purchase the store brand 2 lb. 10 oz. container of old-fashioned oats, I spend $3.59 .  Instead, I go to a local health food store that sells bulk grains for 99 cents per pound.  If I were to buy the same amount there (2 lb. 10 oz.) I would only spend $2.52 - that's for organic, non-GMO old-fashioned oats.  THE ORGANIC OATMEAL IS CHEAPER.
  • Chicken - If I go to our locally owned grocery store and purchase chicken breasts for dinner, I am going to pay $5.39/lb.  That is for non-organic chicken that was raised in living conditions that would make the average consumer sick to their stomach.  Instead, I drive to a local farm and get true free-range, organic chicken for $3/lb.  The difference is that the organic chicken is sold whole, so it takes a little more work to prepare it for dinner.  The bonus is that if I roast the chicken whole, I can use the leftover carcass to make my own chicken broth for free (it would cost me $4.29 for that amount of organic broth at Meijer).  THE ORGANIC, FREE-RANGE CHICKEN IS CHEAPER.
  • Eggs - At our local grocery store, a dozen regular non-organic eggs can cost $2.46/dozen (Eggland's Best), but a local farm sells truly organic, cage-free eggs for $2.50/dozen.   THE ORGANIC, CAGE-FREE EGGS COST THE SAME.
  • Milk - I haven't even looked at the milk in the grocery store for so long that I don't know what the average gallon costs (I'm assuming $3/gallon), but I do know that organic milk in the grocery store used to cost well over $4/gallon.  It costs me $3/gallon at our local farm for raw, organic milk from cows that were fed on pasture.  THE ORGANIC MILK COSTS THE SAME.
  • Yogurt - At our local grocery store, a large container of non-organic, plain Greek yogurt costs $5.49.  I take half of the milk we buy and make our own yogurt, so it costs roughly $1.50.  THE ORGANIC YOGURT IS CHEAPER.
  • Jam/Jelly - If you were to buy an 8 oz. jar of Smucker's jelly at the grocery store, you would pay roughly $2.  Organic jams and jellies range from $4 -$7 per jar.  I can buy locally grown strawberries ($14/4 quarts) and organic, free-trade sugar from the store ($4.59/2 pounds) and make my own jam for approximately $1.76 per 8 oz. jar.  THE ORGANIC JAM IS CHEAPER.
  •  Beef - I don't know what grocery store beef costs, because I haven't eaten it in a while, but I do know that my pastured, organic beef is cheaper.  We spend $1200 every January for a half beef ($700 for the meat and $500 for butchering costs).  That amount of beef will last four of us nine months (we eat red meat five days a week).  If you do the math, we spend $6 per meal (that's $1.50 per person) on our beef. THE PASTURED, ORGANIC BEEF IS CHEAPER.
  • Bread - At our local grocery store I would have to pay $4.99 for a loaf of organic bread.  Instead, I can buy flour for $3.99 (that will make 5 loaves) and yeast for $3.19 (that will make 10 loaves).  If I factor in $1 for extra costs (tablespoons of butter, sugar, honey, etc.), I can make a loaf of healthy, organic bread for $2.12.  That's even cheaper than the junky white bread at the grocery store.  THE ORGANIC BREAD IS CHEAPER
  • Produce - I know that grocery prices range depending on the season and availability, so this is a hard one to gauge.  Our CSA costs us $25 per week for a bushel of produce (plus $2 for a pint of local honey per month).  Our first bushel contained two different types of lettuce, mint, radishes, green onions, and other herbs.  Just one large container of Wild Harvest Organic Lettuce at the store costs $5.99, so we definitely save money with the CSA.  Green beans cost me $1.50 per meal from Meijer right now ($1.05/pound), but my tiny garden will grow enough to feed us green beans twice a week for two months out of the summer.  If we eat only in season, shop at Farmer's Markets, and preserve excess for the winter months, THE ORGANIC COSTS THE SAME.
You get the picture.  I could keep going with this list, but the bottom line is  - EATING ORGANIC DOESN'T HAVE TO BE EXPENSIVE.  But it is going to be work and you have to sacrifice eating your favorite foods anytime you want. 

But that's still too expensive.

Get out of the grocery store.  When you shop there you are paying for convenience and advertising, and with that convenience there is also an added price - additives and preservatives to make the food shelf stable and which take a toll on your body and the Earth.  Go directly to the source of your food and buy in bulk if you want to save money.  Don't get caught in the green-washing trap in the grocery stores.

Eating organic is a lifestyle choice.  When someone decides to eat this way they are usually saying that they don't feel comfortable feeding their family pesticides, antibiotics, chemicals, or inhumanely raised animal products.  They may worry about the environmental implications of it all.  This is why you usually find that families who eat organic food also make other similar lifestyle choices, like cloth diapering, green cleaning, no-poo, etc.  It makes little sense to worry about chemicals in the foods you eat, but then fill your environment with them through the use of toxic cleaners, candles, air fresheners, and cosmetics. 

You can save lots of money by making other "green" lifestyle changes.  For example, cloth diapering saves my family over $800 per year.  That's an extra $67 per month for groceries.  We don't but expensive, conventional cleaning products or even the "green washed" eco-friendly versions in the store.  Vinegar and baking soda can handle all of your household cleaning and clear space in your budget for food.

Cosmetics are the worst.  Families spend insane amounts of money on these items and they are full of chemicals that are just being absorbed through your skin, instead of through your digestive system.  If you're going to cut it out of your food for your family's health, get it out of your bathroom too.  It will save you more money.

If you're uncomfortable with going no-poo or ditching your deodorant, there are other ways to save money.  Ditch your cable (you'll need to free up time in your schedule for your garden anyways).  Without cable there really isn't a reason for a new fancy television, so why not spend that $1000 on some pastured meat for the upcoming year.  Then you can set aside the money you would have spent on meat during your grocery shopping for organic produce.

Aside from the extra money you will have from ridding your shopping list of this stuff, you will also benefit from lower healthcare costs.  Eating good food and avoiding toxins can keep you from getting sick.  Less money spent at the doctor or pharmacy means more money for good food.

The best way to make room for organic food in your grocery budget is to change your eating habits.  Processed organic foods are EXPENSIVE.  If you try to eat from boxed organic food you're going to spend over double what you would on conventional groceries.  You have to change the way you eat.  Instead of giving your children cookies and crackers for snacks, give them some veggies from your garden.  Ditch the juice that isn't good for them anways and give them water in their sippy cups.  They may resisit you at first, but eventually they too will change their eating habits.

Also, think about how much food you waste.  If you add up all of the money spent on the food thrown away from plates that were overfilled, leftovers that don't get eaten, or food that has expired, you realize that there is a lot of room for savings if you just use what you already have.

But I live in a city.

There are farmer's markets everywhere.  You can also drive to get to a farm.  I know many people who are willing to travel an hour to get to a desirable mall to buy a new outfit.  Isn't your food just as important?

If you don't want to travel, you can grow a container garden on your patio or even plant a rooftop garden.  Urban gardening is becoming very popular and there are tons of resources out there to help you learn.

Some families have built self-sufficient homesteads in the middle of the city!

But I don't have the time to do all of that work.

Once again, it's a lifestyle choice.  You can spend your evenings watching television or clipping coupons, or you can use it to bake some bread or care for a garden.  If eating organic food is a priority, you can always find the time for it.

If you involve your children in the work, it stops feeling like chores and it becomes a family lesson in health.  When you teach your children where their food really comes from, they learn to respect it and become conscious of what they are putting in their bodies.  Making yogurt or sourdough bread can become a science lesson for children, as they learn how fermentation works.  Sprouting grains or planting seeds becomes an experiment for a child.  Baking bread becomes a lesson in math as you measure ingredients.  Children love to be involved.

We take our children to the farms to pick up our groceries and the farmers are always willing to let us roam around.  My kids have gotten to play with baby pigs, chase chickens, pet the cows, and interact with the animals that will one day become their food.  Who needs a zoo membership when you get to enjoy a free petting zoo every week?  Plus, your children learn to respect and not to waste the food they are eating, because they may have been playing with that chicken before it became part of their soup.

If you look at your life and decide that the lifestyle changes necessary to afford organic food aren't something you're willing to do, I completely understand.  It's hard work and very time consuming.  Just remember that the "organic food is too expensive for the average family" line just isn't true!

Friday, May 21, 2010

Homemade Tea

Non-organic tea can be really dangerous.  Most of the popular non-organic teas that we drink here in America were treated with a number of chemical pesticides and fungicides prior to being harvested.  The leaves are rarely washed before they are dried, so essentially we are steeping a flavored toxin tea when all we wanted was a hot, healthy beverage.

On top of the chemicals, many brands, like Celestial Seasonings, add "natural flavorings" to their tea blends.  These flavorings, created in a laboratory, could mean just about anything and are far from natural.

Organic tea can be expensive, so one option is to grow and make your own tea.  It's actually very simple.

Here are some instructions for making mint tea.  I love mint tea and use to help with a stomach ache, because mint is nature's anti-nausea medicine.

Step One:  Cut your mint.  With mint it is best to harvest your leaves between 9 AM and 12 PM, because this is before the heat from the sun has had a chance to dissipate all of the oils in the leaves.


Step Two:  Remove the leaves from the stems and give them a really good rinsing.  Make sure to compost your stems.


Step Three:  Dry your leaves.  You can do this many different ways.  Some people like to hang their herbs upside down (stems and all) to dry outside, but this takes 2-3 weeks.  If you live in a warmer climate where the temperature will stay over 100 degrees for as long as it takes the leaves to dry, you can do this outside by placing your leaves on something like a window screen to dry.  I prefer to use a food dehydrator.  It takes very little time, uses little energy, and ensures that my leaves get completely dry and will not end up molding.


Step Four:  Once your leaves are dry and crispy, you can crush them.  Just make sure you don't make the flakes too small or you will have a lot of floaties in your tea.


Step Five:  Steep your tea.


Step Six:  Enjoy!


Make sure you store your dried herbs in an air-tight container.  Your herbs also retain better flavor if you wait to crush them before storing, so only crush what you need for one cup of tea at a time.  Always check your leaves for signs of molding before using them, and discard them if they are turning brown.  If you keep them in a dry, cool place away from sunlight, they should last for up to a year in storage.

If you aren't harvesting a large amount of herbs and you just want enough tea for one cup, you can skip the drying and just pull a few leaves from your plant.  Boil the leaves in some water and you will have delicious, healthy, organic tea.

-Jessica

Monday, May 3, 2010

Toxic Bodies

There are more chemicals in existance than I could ever count.  They are found in literally everything we use on a day-to-day basis.  But, the scary fact is that most of these chemicals have never been tested on human beings.  The companies that manufacture these items tell us that their products are safe for us in tiny amounts, but they have no proof to either support or oppose their claims.  They also can't tell us about potential long-term damages, because the products haven't been around long enough to know.

It seems like we hear studies coming out in the news every other day about recalls due to toxic chemicals or that suddenly a certain ingredient has been found to cause cancer or infertility.  Remember what happened with DDT?

The problem is that while we may think that a little bit of a chemical sprayed on our apple or a tiny amount of a toxin in our laundry detergent isn't going to hurt anything, we are forgetting that we are constantly absorbing these chemicals into our bodies in one way or another all day long - without a break.  What about the cumulative effects?

Think about your average day and look at just a small amount of your chemical exposure -

We wake up and brush our teeth in fluoride-filled water with chemical toothpastes and wash our faces with soaps full of parabens and sulfates.  We shower in a tub cleaned with bleach, using chemically treated water and rub more chemicals into our skin and scalp through washing, shampooing, shaving, and conditioning.  We then do our hair with more chemicals, inhale the fumes from hairspray, apply aluminum-filled deodorant, put on make-up, lotion ourselves with some more chemicals, spray ourselves and our lungs with some perfume and head to the kitchen for breakfast.

We then sip on our coffee (that is usually mixed with chemicals), made from tap water that is full of toxins and in a liner with paper that has been bleached.  If we drink decaf, it is usually made by taking the regular coffee bean and mixing it with a chemical solvent.  We cook our antibiotic-filled eggs on non-stick cookware or sprayed with a no-stick spray that puts more chemicals into our food.  The rest of our meal is a mixture of pesticides, herbicides, food dyes, additives, preservatives and whatever drugs were given to the animal we are consuming.  We often eat on plastic plates with plastic utensils and cups, which also put toxins into our meal.

After we are done, we wash our dishes with some more chemicals and we wipe the surfaces in the kitchen with toxic cleaners.  We may have some scented candles or fragrance plug-ins somewhere in the kitchen that we are also breathing in.

Time to head to work.  We step out of the house and onto our chemically treated lawns and driveways, buckle up into our cars full of plastic, and start breathing in the lovely fumes from all of the cars on the road.

Once at work, the smell of the industrial cleaners enters our noses and starts giving us a headache.  We go about our day, eating more toxic food and drinking more unhealthy drinks.  Throughout the day we wash our hands with more chemicals - we may even decide to coat our skin in antibacterial lotions

After work, we stop at the salon to get a quick manicure.  We breathe in more fumes while we coat our nails with chemicals.  Once they are dry, we head back to the car and decide to run through the drive-through for some dinner.  The food has all been stored in plastic, heated in plastic, and served in more plastic. 

Back at home, we decide to relax on our flame-retardant couch after dinner.  Our windows are shut, since the air-conditioning is on, so all of the fumes from the paint, fabric, carpet, plastic toys, mattresses, cleaners, lamps, candles, blinds, etc. are just circulating throughout the house.

Before bed we brush with our chemical cocktail one more time and wash our faces "clean" again.  We may take some medicine before we sleep for 8 hours on a chemically-treated pillow that was washed in detergent.
This doesn't even begin to describe our chemical exposure in a normal day.  Every new environment we enter, every surface we touch, everything we rub on our skin, every medicine we take, every food we eat - it all contains chemicals that our governmental agencies tell us are safe in small doses.  But what about the cumulative effect of all of this chemical exposure?

That may be fine for you as an adult, and you may be healthy as a horse, for now.  But what about a small child or even worse, a baby?  Not only are their little bodies less able to handle a toxic overload, which can impact their development and some theorize could be causing the increase in things like ADD, ADHD, Autism, food allergies, etc., but their environments seem to be even more toxic.

Most babies spend 24 hours a day in a chemical-filled diaper, with chemical filled creams on their skin, sucking plastic pacifiers, drinking out of plastic bottles, sucking on plastic toys, and eating from plastic spoons.  And whether you formula feed or breast feed, you are still exposing them to toxins, because most mother's milk that is tested contains high levels of chemicals and toxins, like Bisphenol A.

You may be thinking, well this is insane.  You're just an alarmist (and believe me, I'm used to being told that).  You're probably thinking that this is just the way our modern society is and if it wasn't safe, the government would be doing something about it, right?  Well, what can they do?  Our economy is based on the production and consumption of these things.  What would happen if they no longer exist?

Experts agree that something has to happen.  I recently watched a documentary called The Disappearing Male, which showed how fertility is on the rise.  The sperm count of the average man is decreasing significantly and even the size of the average male baby's testicles is decreasing.  This is due to the mother's exposure to plastics while the baby is in the womb and throughout childhood, which effect the endocrine system and reproductive growth.  This problem has been observed in animals, specifically a group of alligators in a polluted area of Florida.  You can watch the documentary here.

We tell pregnant women to limit their exposure to chemicals, because we know that these toxins can cause birth defects.  We tell them not to clean with chemical cleaners, breathe in paint fumes, eat fish that contain high levels of mercury, take certain medications, etc.  We know that it is dangerous for a fetus to be exposed to those toxins, but why would it be any different for an infant who is rolling around on a surface that was cleaned with bleach or playing in a house that is being painted?  Couldn't the fish with high levels of mercury be affecting a school-aged child that has a compromised immune system?  And what about adults - couldn't some of us be susceptible to damage too?

There just isn't enough testing done to know for sure.  Why risk it?

It's time for us to change our environments - to protect our children from the toxins we surround ourselves with daily.  Of course, we can't change all of our chemical exposure, but we can take steps to significantly decrease the amount.  It as simple as:

  • reading and learning about the ingredients in something before you use it
  • choosing organic foods
  • buying paraben and sulfate free cosmetics or seeing if we can do without them
  • slowly getting rid of the plastics in our homes and trying to purchase items made out of natural materials instead
  • choosing not to treat your lawn with chemicals
  • getting rid of all of your scented candles and plug-ins
  • switching to a free and clear detergent or making your own
  • installing a reverse osmosis system for your drinking water
  • buying unbleached paper products or switching to cloth instead
  • using glass bottles instead of plastic
  • using cloth bags instead of plastic ones when shopping
  • getting rid of your plastic food storage system and replacing it with glass
  • opening your windows to let fresh air in the house
  • buying more house plants to help filter the air
  • washing your hands with natural soaps instead of using hand sanitizer
  • limiting the amount of medicine you take and trying natural medicine instead
  • cleaning with vinegar and baking soda instead of harsh chemicals
  • making your own food from scratch instead of consuming processed items
  • cloth diapering/using mama cloth
  • using natural pesticides/herbicides in the garden
  • driving less
  • and so much more!  I haven't even scratched the surface!!
Just by doing one new thing or getting rid of one new thing each week, you can start to decrease the number of chemicals and toxins that you and your children are exposed to on a daily basis.  Remember that many of the popular chemicals that we use are fairly new and we may just now be starting to see the long-term effects of their usage.  Our children deserve the best chance at a healthy life that we can give them!

-Jessica

Friday, April 30, 2010

Homemade Soaked Granola Bars

Granola bars are considered a healthy snack by many people - they usually contain oats, nuts, dried fruits and other things that are good for you.  But most of the processed bars also contain a lot of things that are very bad for you.

Let's look at Nature Valley's 100% Natural Chewy Trail Mix - Fruit & Nut bars. 

Ingredients:  whole grain oats, high maltose corn syrup, rice flour, raisins, almonds, honey, sugar, roasted peanuts, fructose, sunflower seeds, canola oil, cranberries, maltodextrin, soy lecithin, salt, malt extract, baking soda, natural flavor, and mixed tocopherols.
That's EIGHT different sugars in one little granola bar.  Yikes!

What about something that is considered a little more healthy - Kashi's TLC Chewy Granola Bars Honey Almond Flax?

Ingredients:  rolled grain blend (hard red wheat, oats, rye, triticale, barley), roasted salted whole almonds, brown rice syrup, soy protein isolate, soy grits, evaporated cane juice crystals, chicory root fiber, whole flax seeds, evaporated cane juice syrup, rice starch, corn flour, honey, expeller pressed canola oil, vegetable glycerin, oat fiber, natural flavors, evaporated salt, Kashi seven whole grains sesame flour (whole: oats, hard red wheat, rye, brown rice, triticale, barley, buckwheat, sesame seeds), molasses, soy lecithin, peanut flour, whey protein isolate.

Only FIVE sugars in this one.

But the sugars aren't the only unhealthy thing about these "healthy" snacks.  They both use genetically modified ingredients, canola oil (at least Kashi's is expeller pressed), and those mysterious "natural flavors" that could include just about anything.

Your best bet is to make your own granola bars.  I found a wonderful recipe here that I decided to modify using soaked grains and nuts.  Remember that it is always important to soak your grains, nuts, legumes and beans before consuming them!

Here is how I made my chewy granola bars.  To make my recipe you will need a dehydrator.  I will also warn you that I didn't measure anything - you can't really mess this up, so just use as much as you want of each ingredient.

Step 1:  Soak some organic oats, raw almonds, and raw sunflower seeds for 12-24 hours.  The longer you soak, the better.

Step 2:  Drain and rinse your ingredients and then dehydrate them for a while.  I did it until the oats were half dry.


Step 3:  Pulse your almonds in the food processor.


Step 4:  Toss your oats, almonds, and seeds into a large mixing bowl.  Add your dried fruit - I used raisins and chopped dried figs.  Add your sweetener - I used raw, local honey


Add your fat - I used coconut oil so that my dairy-allergic son can eat them, but butter would also taste great.  Add anything else you want - I used cinnamon and flax meal. 


Step 5:  Mix.  Skip the spoon and just use your hands - it's much easier.


Step 6:  Put some wax paper on a flat surface and plop your ingredients on top.


Step 7:  Put another piece of wax paper over your ingredients and roll them until they are the desired thickness.  I like mine thicker.  Just remember that the thicker they are, the longer they will take to dehydrate.


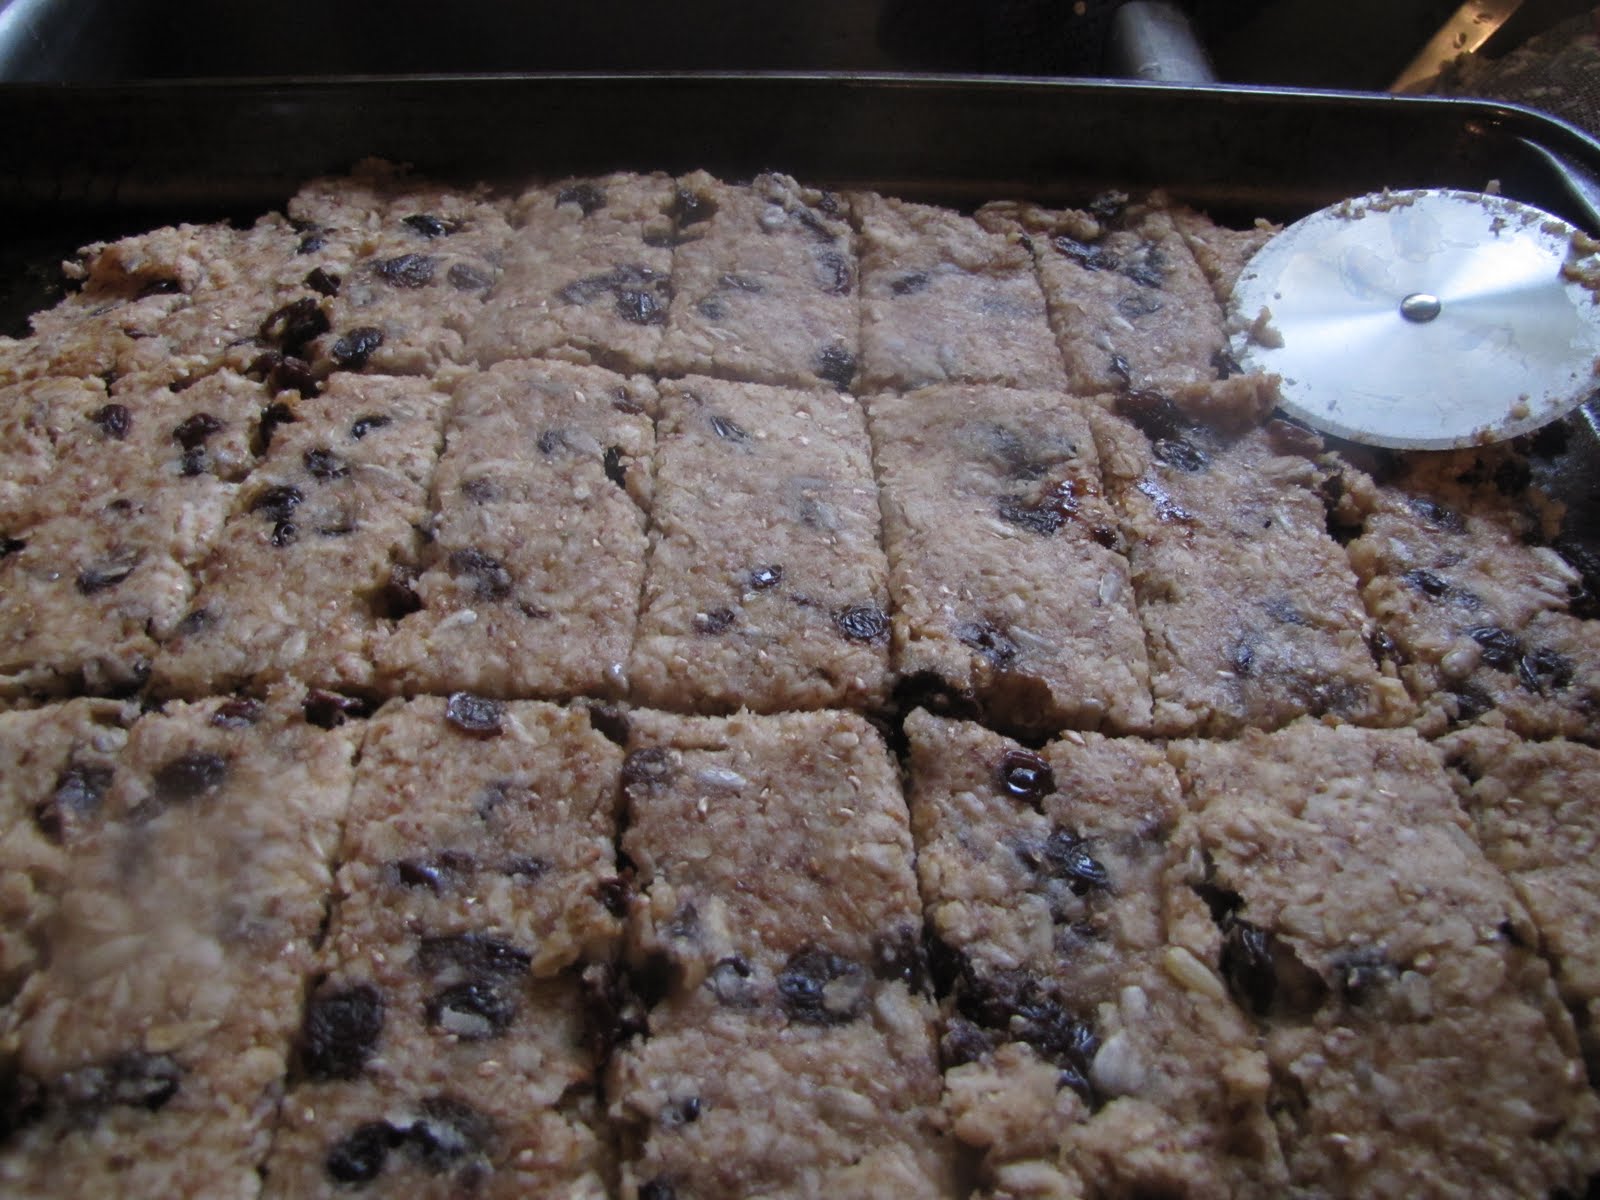
Step 8:  Peel off your top layer of paper and cut your bars with a pizza cutter.


Step 9:  Transfer your bars to the dehydrator and turn it on until they dry.  It took my really thick bars about 6 hours to completely dry today.


Step 10:  Enjoy!


Here is a picture of one of the thin ones for the children and the big, thick, Mommy-sized bars :)


It's as easy as that - a fresh, healthy snack for your family without all of the nasty additives, preservatives and sugars. 

-Jess

Sunday, March 21, 2010

How To Make Your Own Compost Bin

First, you may be wondering why I am talking about composting on my wellness blog.  Well, gardening is the easiest and cheapest way to ensure you are getting local, in-season, organic produce.  I'm a novice gardener and am learning as I go, so I thought I would share my journey with you guys. 

Composting is something I have always wanted to do, but have never really known where to start.  You can find a ton of information on the Internet about the topic, and everyone seems to have their own method for doing it.  After doing a little research, I decided that you can't really mess it up too badly, so I'd just do whatever seemed right for us.

Adam and I are currently planning our garden for the year and as we were seed shopping we saw some nice compost bins for sale (for over $100).  But as I looked at them I told Adam that we could make something similar out of a Rubbermaid bin for free at home.

My first idea was to use a regular Rubbermaid bin, but then I realized that we had some of the larger ones on wheels that would be easier to drag around the yard once the compost is finished.

Here is what I used.


I had Adam drill some holes in the bottom that would be big enough to let worms and other creepy-crawlies in, and also drain the excess water out.


A compost bin needs to allow air to escape, because methane can build up and cause an explosion inside the bin.  Luckily, the handles of this bin have some air holes (you can see them on the above picture on the left side), but I also had Adam drill some small holes on the lid.


Now my container was ready to fill.

I filled it 2/3 of the way full with dry, "brown" materials - shredded paper, leaves, wood chips, dried stuff from my landscaping, etc.  You can also include sawdust, straw, cardboard, newspaper and other similar items in this layer. 

Unfortunately, the only tree we have on our property (besides evergreens) is an oak tree, and their leaves aren't supposed to be the best for composting.  They will work, but are pretty acidic and will take longer to compost.  But, I went ahead and tried it with them.

Once I filled the bin, I covered it with water until everything was saturated well, but not swimming.


I created a "wet" container that will live at the edge of my back patio.  At the end of every day, I will dump the contents of the glass container in my kitchen where I will keep my "green" materials into this bin.


Items that are considered "green" materials include - food scraps (anything but animal-byproducts and processed foods), coffee grinds/filters, tea bags, hair (animal and human), egg shells, grass clippings, etc.

A few months ago, I found a box of cabbage in my garage that I had forgotten about.  It was obviously rotten, but I knew I was going to compost this year, so I kept it in a sealed container in the garage (gross, I know).  This rotten cabbage, along with some coffee grinds, food scraps, and a generous helping of Max the dog's hair, became our first wet contribution to the compost bin.

I put it in the compost bin and watered it down again.


Yum, right?!

Finally, I added a thin layer of garden soil to top it off and watered again.


It has been covered and now has a home in the back of the house, right next to a water source.


See the pitch fork in the corner?  That is the only tool I'll need from now on.  Once a week I will open my bin and "turn" the contents by basically stirring them with the pitch fork.  Every 5-6 weeks, I will add another layer of "brown" materials from the yard, "green" materials from my wet bin, and soil from the garden to keep it going.

Hopefully, in 2-6 months we'll have some lovely compost.  The microbes and other fun things that live in the soil will feast on my "stew" and increase the temperature of my bin.  This will cause everything to decay and create a lovely product for my garden beds.  The more often I "turn" my compost, the faster this should happen.

Not only does this save me money and decrease the amount of waste I am sending to the dump, but it guarantees me organic compost and will help me provide healthy, nutritious produce for my family this year!

-Jess

Thursday, March 18, 2010

Q&A: High Fructose Corn Syrup

I was wondering if you have ever tried doing a high fructose corn syrup (HFCS) free diet. I recently saw a youtube video called "Sugar: The Bitter Truth". It's really long and kind of boring, but it scared me away from HFCS. I've been thinking about trying to do a HFCS free diet, but I've noticed it's in just about everything we have. Have you tried this? Have any tips?

My Views on Sugar

I limit the amount of sugar that I consume for many reasons.  Sugar consumption leads to obesity, heart attacks, artery disease, tooth decay, diabetes, metabolic issues, concentration issues, fertility problems, and upsets the balance of the endocrine and nervous systems. 

Our ancestors did not consume sugar in the same ways we do and our bodies were not designed to consume it in large quantities.  In the past, natural sweeteners were used sparingly to sweeten foods and desserts were viewed as a treat reserved only for special occasions.  But now, the average American consumes more than 22 teaspoons of sugar per DAY (mainly from beverages like soft drinks) and many children and teenagers consume almost double that amount.

If you shop in the grocery store and consume mostly processed foods, you can pretty much guarantee that everything you eat has some type of sweetener in it.  Our taste buds have grown so accustomed to tasting it, that we hardly recognize exactly how sweet our foods are.

And here is the problem with the way we consume sugar in our society - most of our sugary foods (like soft drinks and candy) do not contain fat.  Fat slows the sugar from entering our blood stream in a rush and stimulating insulin and hormone production.  Our "high carb/low fat" diets are literally killing us.  In fact, we should be doing the opposite - consuming higher levels of healthy fats and less carbohydrates.

As a rule for myself, I avoid refined sugars, artificial sweeteners, and even some "natural" sweeteners.  The only sugars I consume are fruits, raw honey, and unrefined maple syrup.  Occasionally I will crave a soft drink or a cookie with sugar, but I reserve those foods for special occasions and do not keep them in the house for myself.

This year for Lent I gave up sugar (except fruit) - honey and maple syrup included - and have not intentionally consumed it for over a month now.  For the first four days my body crashed.  I was irritable, tired, and hungry all of the time.  We forget that sugar is actually a drug (an addictive one) that affects not only your blood sugar, but also your brain chemistry.

But once I made it past those first four days, I noticed that my energy levels started to increase and my mind felt clearer than normal.  After a few weeks more, my appetite started to decrease and I now don't feel the need to snack as much.  My body no longer craves those foods throughout the day.

So, you're probably wondering - what can a person eat if they avoid sugar completely?  Here was my food intake yesterday:

Breakfast - 2 slices of raisin toast with butter and 2 scrambled free-range eggs mixed with chopped spinach.

Snack - some almonds and a few apple slices

Lunch - canned tuna mixed with olive oil and salt/pepper, and a few slices of cheese on homemade bread

Snack - a banana and some pumpkin seeds

Dinner - chuck roast (with the broth used as a condiment for dipping), okra breaded in spelt flour and fried in olive oil, and a bowl of grapes

Snack - 3 pieces of cheese and a slice of homemade toast with butter
My beverages most days consist of unsweetened hot and iced teas, water, and fruit smoothies.

The hardest part about going sugar-free is not having condiments with your foods.  Most store-bought condiments contain HFCS - ketchup, barbecue sauce, taco sauce, salad dressings, mayo, salsa, etc.  In order to have condiments with your food if you are going to go sugar-free, you have to make your own.  If you are just trying to eliminate HFCS from your diet, most organic brands of condiments contain organic sugar or other sweeteners.  They are a little more expensive, but worth it in my opinion - just use a little less to make up for the cost.

Other ways to avoid HFCS and sugars:
  • Make your own jams and jellies, or buy the brands labeled "no sugar added".  Fruit is sweet enough; it doesn't need more sugar to taste good on bread. 
  • Make sure your fruit juice has no added sugar.  Many juices can contain as much, if not more sugar than a can of soda.
  • Make your own salad dressings.  My favorite recipe is a mixture of virgin olive oil, lemon juice, a squeeze of raw honey, garlic, salt, pepper, and any herbs I am in the mood for (dill, sage, rosemary, etc.)
  • Buy plain peanut butter.  The average brand of peanut butter contains more than one type of sugar - HFCS, molasses, honey AND sugar.  Usually when you eat peanut butter, you are spreading it on bread with jelly, which is sweet enough.  You don't need added sugar in your peanut butter.
  • Bake your own bread.  You can even substitute raw honey for sugar in most bread recipes to avoid refined sugars.  Or even better, make some homemade sourdough without any sweeteners at all.
  • Always read your labels and buy unsweetened/plain when available.  You can always add a little honey or sugar to your food if it needs it, but you rarely need the amount that is in the sweetened versions of foods (for example: applesauce and yogurt).
  • Don't buy canned fruit.  Aside from the fact that the lining of the cans is toxic, most of the fruits are soaked in syrup.
  • Cook your food at home.  Nearly everything you eat at a restaurant contains HFCS and sugar.
  • Avoid buying processed foods that say "sugar free".  The sugar in these foods has usually been replaced with artificial sweeteners, which are just as bad for you as HFCS.
  • Watch your processed meats.  Most of them contain sweeteners.
What is the difference between a natural sweetener and a refined sweetener?  Which ones are the best for me?

The following are natural sweeteners. This means they are the least processed and they contain more vitamins and minerals. Use these if you have a sweet tooth!
  • Raw Honey
  • Unrefined Maple Syrup
  • Agave Nectar
  • Date Sugar
  • Sorghum Syrup
  • Barley Malt Syrup
  • Fruit
The following are natural sweeteners that should be avoided for various reasons.
  • Concentrated Fruit Juices - They are composed mainly of fructose in levels so concentrated that your body is unable to regulate blood sugar properly.
  • Raw, Natural, Turbinado, Sucanat, and Florida Crystals - They upset your body chemistry and are refined, which removes most of the nutrients.
  • Brown Rice Syrup - The rice is cooked with enzymes, which are many times genetically modified.
  • Stevia - It is a calorie-free, herbal substitute that does not affect blood sugar. Although it has many medicinal uses, including the treatment of heartburn, its safety is still questionable.
  • Molasses - A byproduct of the processing of sugar cane with a strong taste and moderate sweetness. If it comes from sugar cane grown in the right type of soil, it can contain especially high levels of iron, calcium, zinc, copper and chromium.
The following are refined sweeteners that should be avoided.
  • White Sugar (sucrose) - has little, if any, nutritional value
  • Brown Sugar
  • Refined maple syrup - formaldehyde is used in the production.
  • Corn syrup - is usually genetically modified.
  • Fructose - causes deleterious effects, especially in small children
  • Glucose
  • Dextrin - made by boiling corn starch with acid
  • Dextrose
  • Processed honey
  • Maltodextrin
The following are artificial sweeteners, which have been linked to headaches, gastro-intestinal problems, panic attacks, depression, nervous system disorders (specifically fibromyalgia and multiple sclerosis), male infertility, cell damage, and cancer (specifically bladder and reproductive organs).  NEVER EAT THESE!
  • Aspartame - linked to cancer of the reproductive organs.
  • Saccharin - linked to bladder cancer
  • Mannitol
  • Sorbitol - labeled to warn of nausea, diarrhea, and vomiting.
  • Xylitol
  • Splenda (sucralose) - a chlorocarbon (contains chlorine) linked to organ, genetic and reproductive damage. Lab rats show a 40% shrinkage in thymus gland (foundation of immune system) when given Splenda.
Here's the bottom line!

Avoiding sugar is easy to do if you are willing to put in a little hard work first.  Your body is going to have to detox and it is going to be uncomfortable for a few days or even weeks.  But, once you get past the initial withdrawal, you will start to feel so good that you'll realize a soda isn't worth it.  Your taste buds will also change and most of the foods you once thought tasted good will become too sweet for you.

Make your own food and read your labels.  And as always - everything in moderation.  You're not going to die if you eat a cookie or drink a soda every now and then, but when you eat them day after day your body and brain become addicted and the sugar begins to get every system in your body out of whack.  Stick to natural sweeteners and use them in moderation.

-Jess

Sources

"Exactly What Is Splenda? .: Ask Dr. Hull." Dr. Janet Starr Hull, PhD, CN - Website. Web. 11 Sept. 2009. .

"Substitute Natural Sweeteners for Artificial Sweeteners." Body Cleansing / Detox Plan and Natural Cures. Web. 11 Sept. 2009. .

"Top 10 Dangers of Artificial Sweeteners." Nutrition Supplements News. Web. 11 Sept. 2009. .

Wednesday, February 24, 2010

Q&A: 10 Steps To Save Money On Organic Food

I was curious about buying organic. I'm assuming you do. If so, could you write a post about it? I looked but didn't find one. I do want to eat organically, but it's so expensive, and where I live it's about a 30 minute drive to find organic foods.

I love this question! I get asked this quite often. Here is a list I created to help answer it:

Ten Steps To Save Money On Organic Food

Step One: Analyze Your Budget

Take a month and track everything you spend money on - I mean EVERYTHING down to the soda from the vending machine to the bottled water at the gas station. At the end of the month, take a look at your expenditures and categorize them into the following areas: bills, groceries, gas, entertainment, other food, and miscellaneous.

Doing this is eye-opening for the average American. If you are anything like I was when I did this last year, you will notice that you spend way more than you thought you did on random food outside of the home (my biggest expenses were drinks from the vending machine at work and tea at the local coffee shop).

Take an honest look at your budget and ask yourself, "Is eating organic food really important to me?" If it is, then ask yourself what you are willing to do without in order to afford the added expense. Our family does without cable and expensive cell phone plans. We haven't gone out to eat at a restaurant in almost two years and we do not go on expensive vacations. These are things that we do in order to eat the way we do. Our health is just a huge priority for us.

Step Two: Prioritize

Now that you have squeezed some extra room into your budget for organic foods, you need to decide what is most important for you.

For many people it is produce - most people try to avoid the Dirty Dozen (peaches, apples, bell peppers, celery, nectarines, strawberries, cherries, pears, grapes, spinach, lettuce, and potatoes) and only buy them when they are organic. This is because these foods tend to have the highest levels of contamination from pesticides.

The Clean Fifteen (onion, avocado, sweet corn, pineapple, mango, asparagus, sweet peas, kiwi, cabbage, eggplant, papaya, watermelon, broccoli, tomato, and sweet potato) have the lowest levels of contamination, so you can get away with not buying organic.

Here is a full list of contamination levels of common fruits and veggies.

Other people prefer to spend their limited budget on pastured meat or eggs, or dairy products that do not contain antibiotics or hormones. You have to decide what is most important for you and focus on trying to find the best deals on those foods.

Our family tries to avoid the dirty dozen and will only eat pastured meat and eggs. We prefer raw milk, but when I run out and have to buy at the grocery store, I refuse to spend $5 on a carton of ultra-pasteurized, organic milk. I prefer to buy the non-organic milk that says it is free of hormones and antibiotics, and isn't ultra-pasteurized. It costs half as much and tastes much better to me.

Step Three: Try To Grow Your Own

Obviously, not everyone lives on a farm and is able to raise their own animals or milk their own cows, but we can take the foods that are most expensive in the store or that we like to eat the most and try to cut costs by growing them ourselves.

I posted last year about a family who lives in the middle of Los Angeles and created their own urban homestead. If they are able to love almost entirely off of 1/4 acre in the middle of the city, just imagine what some of us could do who have even more land!

If you live in a neighborhood that has strict laws about growing gardens or having animals, you may want to look into edible landscaping. You could remove all of your decorative flowerbeds and instead plant fresh herbs, edible flowers, fruit trees, berry bushes, etc. in place of them. You could also plant vegetables in pots and place them on your back deck or near a window inside of your home.

Some neighborhoods will even allow you to have backyard chickens as pets, so long as you don't have any roosters (they are a bit too loud).

The more you grow yourself, the more money you save.

Step Four: Stop Buying Processed Foods

Processed organic foods are a joke. Do we really need organic brownies? Organic cookies? Organic frozen burritos? Just because they say "organic" it doesn't make them healthy.

I will admit that if given a choice between a regular frozen burrito or an organic one, I would probably choose the organic one because I can usually pronounce all of the ingredients. But when you buy processed foods you are paying for convenience.

If you are going to buy processed organics, you can find some coupons here.

These organic processed foods cost nearly twice as much, sometimes more, than their non-organic equivalents. For example, there are some very popular brands of organic salad dressings that you can buy at major grocery chains for around $5 per bottle. Their non-organic equivalents are less than half that. But even the non-organic brand is too expensive when you consider how little it would cost to make it yourself, which brings me to...

Step Five: Start making food from scratch

I used to be obsessed with Amy's brand organic soups until one day I realized that for the amount of money I spent on one $4 can of lentil soup I could buy enough bulk lentils to make soup for our entire family.

Now I pretty much make everything from scratch - soups, noodles, burritos, breads - you name it. It saves so much money - of course, you have to factor in the amount of time spent cooking and decide whether or not it is worth the money saved.

But this goes hand-in-hand with step two - what are your priorities? Take a look at how you spend your free time and see if there are ways you could squeeze out an extra half an hour a day to make some homemade crackers or to juice your own apples. You'd be amazed at how much free time you have in a day - you just have to decide how you want to spend it.

You could also ask for some labor-saving appliances as gifts on your next holiday. A bread-maker will do everything for you - mix, knead, bake - and it will only take you five minutes to throw your fresh, organic ingredients into it each morning. Other items like juicers, dehydrators, canning supplies, food processors, gardening tools, etc. will help you save time.

Step Six: Start going directly to the source

The closest Whole Foods or Trader Joe's to where I live is almost an hour away. Not only would I spend a fortune in gas driving there to shop every week, but the food there is ridiculously overpriced.

But my other option where I live (in the middle of nowhere) is a small health food store that also has very high prices. I used to go to that store to buy my meat and then one day I noticed that the name on the package was local. Why not just drive to the farm and save some money?

So that's what I started doing. We now get our raw milk, eggs, meat and a majority of our produce from farmers in our area. There are so many benefits to doing this - you save money, you get to see the health of the animals, you get to learn about how the farm operates and whether or not it truly is organic, you get to keep your money in your community, etc.

Many people feel lost and don't know where to start looking for local sources of organic foods. Here is what I suggest - first, start going to your local farmer's market. If you're not sure when and where it is, contact your city (township, village, etc.) officials and ask who you need to speak with. The person in charge of the farmer's market may even be able to give you the names of some of the vendors to start your search.

Next, ask around at your local health food store (or other places that healthy people seem to be). Ask the owners where they get their meat, eggs, or milk from. My local store even has bulletin boards with information available about local sources for many foods.

You can also get involved in community supported agriculture and find a co-op near you. This way you can get cheap, fresh, organic produce practically delivered to your front door every week.

Finally, start attending your local chapter meetings of the Weston A. Price foundation. This organization has so much information to give to you and many times they hold mini-farmer's markets at the meetings so you can purchase organic foods at a good price. This is an excellent source for raw milk products.

Step Seven: Buy In-Season

I posted about the benefits of eating in-season produce last year. If I need to buy a food that is out of season and I have a choice between frozen and fresh, I generally buy frozen, because I know it was probably picked when it was riper (and it costs much less).

There is a reason why those organic mangoes cost so much in Ohio in the middle of February - they don't grow anywhere near here in this climate. When you buy out of season not only are you sacrificing the nutrient content of your produce, but you are basically paying extra to have the food shipped to the store. Instead, start purchasing only the foods that are in-season (do a google search to find out which seasonal foods grow near you).

Buy as much produce as you can when it is in season and then learn how to preserve it for the winter months, which brings me to...

Step Eight: Learn how to preserve your food

When something is on sale, buy a bunch and either can it, freeze it, or dehydrate it. This will cut down on your winter grocery bills and is also the only way you can guarantee that the produce you are eating in the winter was picked fresh and is local.

Frozen fruits don't taste very good once they are thawed if you are going to eat them plain, but they are wonderful in smoothies, desserts, and as purees/sauces.

We like to use a dehydrator to dry out all of our fresh herbs and save them for later use. You can also make your own homemade fruit leather with the dehydrator.

Step Nine: Buy in bulk

It's always cheaper when you buy more. At my farmer's market, many vendors offer deals when you buy in bulk (buy your apples by the bushel and they cost less than by the pound, etc.).

I have found that buying my meat in "bulk" makes it much cheaper. We purchase a half-beef every 9 months or so and we have calculated that it works out to be around $18/week for our pastured, all organic-meat (2 adults/2 children eating beef 3 times per week). That is comparable to what we would spend on non-organic beef in the grocery store if we bought on a weekly basis.

There are also farms out there, like this one, that offer organic foods in bulk at very reasonable prices. I used to order from this company, with a group of people, and get all of my dry goods for very cheap. We did it in a group because there are minimum amounts required for delivery. Once a month our group would place orders and one of the group members would pick up our orders and be responsible for separating them out. It was work for the person in charge, but it saved a lot of money.

Step Ten: Eat less/Waste less

According to this source, Americans throw out an average of 1400 calories per person every single day. Think about how many times you let that bag of lettuce go bad before you toss it, or let the milk spoil before anyone drinks it. If you factor the amount of money you spend on food that gets thrown away every month, I bet you could put a small dent in your organic grocery bill.

Instead of throwing things away, learn to preserve your produce before it gets a chance to go bad. If you buy more apples than you plan on using in a week, try making some applesauce with the rest. If your milk is spoiled, learn to make cheeses and other dairy products from it. If you make too much food and have leftovers, instead of letting them sit in the fridge for a few days and go bad, try freezing them for later use.

Learn to use everything so that you don't have to waste it. For example, when you buy a large broiler chicken, don't discard the carcass and drippings after you cut away the meat. The drippings can be frozen and used for gravies at a later date. Place the carcass in a crock pot or oven with some water and make your own homemade broth that can be used for a soup. I've seen organic, free-range chicken broth for $4 in the grocery store. Why would you pay that when you could get it for free from one dinner's worth of "waste"?

So there you have it. If you learn to do these things, you can significantly reduce your organic grocery bill. I'm not going to lie, eating organic for cheap is A LOT more work, but remember, buying processed foods is expensive because it is convenient. I have found that once I moved into an organic "mindset" I started taking pleasure in the work - the preserving, the cooking, and now the gardening. What used to be a chore has now become a hobby in which I can even involve my children.

It is also important to remember that every little bit counts. It would be nearly impossible to eliminate every single but of exposure to pesticides and toxins in your environment. We all try to do the best we can. Find what foods are most important for you and start with those. Eventually you will find ways to cut back your bills so you can afford other foods.

When my family started eating this way we were spending over a thousand dollars EACH MONTH on our grocery bills. I am happy to say that I now spend an average of $600 per month (we eat every meal at home) on a family of four on a diet that is almost completely organic and the extra work has become such a part of my routine that I don't feel like I am missing out on anything by putting forth the extra energy.

Good luck on your organic adventure!

-Jessica